Major Project

My role

For my main role for the major project I was tasked with being a UX and UI developer. For this role I was to design a main menu for our game and create UI for all the different elements in our game such as pause menu and dialog boxes. As the UX developer I need to try and make the UI easy to follow and allow the player to not be overwhelmed by the amount of options there is. I was tasked this by my team as I have made main menus before for other projects and I have had some previous experience in that field.

For side roles I may take on in the project I am able to do character design and also 3D modeling depending on the amount of 3D models that need to be produced by the other 3D modelers. Additionally I will be creating cutscenes as part of my role in the project. These will be used to tell the narrative of the game and will introduce characters into the story.

Overview

Our project will be a first person murder mystery game demo that will take place in the early 1920s. The game will take place on a steam boat in new Orleans and the player needs to solve the murder before the boat gets to land. To solve this murder the player must investigate and find clues around the boat to decide who the murderer is and speak to the different passengers on the boat for additional clues and to work out who the murderer is.

Genre: The genre of the game will be a noir detective thriller.

Setting: The game will take place on an old time paddle steamer boat, named the SS Arctic, travelling through the swamps in New Orleans.

Story: While travelling down the Mississippi aboard the SS Arctic, Detective CC Tinsley by chance becomes embroiled in a party full of old acquaintances when the host of the event is found dead in an unusual manner. Because Detective CC Tinsley had no connections to the other passengers, the boat’s captain assigns him the responsibility of determining the truth behind this stunning tragedy.

Characters

We have created a unique set of characters with different backgrounds and motives. This will make it so that when we eventually decide who the murderer is we can have different evidence pointing to different people to keep the mystery of the situation. The characters are as followed:

  • CC Tinsley (Detective)
  • Captain Luce (American)
  • William Eubanks (American)
  • Fernand Lacroix (French)
  • David Kirkwood (British)
  • Irene McAllister (British)
  • Lillian Brown (American)
  • Mr Watanabe (Japanese)
  • Franz Haber (Prussian)
  • Jacque Bennétt (French

Gameplay Mechanics

Movement: The game will be first person and the player will have the ability to walk around the environment. A crouching feature will also be implemented to allow the player to enter additional areas.

Interrogation/conversation: When communicating to an NPC the player will have the option to pick what they would like to say to the other characters through a dialog system. Dependent on the information the player has received by collecting evidence new dialog options will appear to further the plot.

Evidence board/deduction: The player can inspect the evidence board at any moment during the game and draw judgments based on the evidence they have at the time; some evidence may indict someone, while other evidence may establish their innocence.

Evidence gathering: Different objects can be collected in the environment that may or may not be used as evidence. The player will be able to inspect these pieces and see if there is evidence on them. After doing so the player will be able to pin it on a pin board so that they can keep track of evidence they have collected.

Journal/notes: The player will be able to take notes on a built-in notebook, which they may go to at any moment to check whether what they write down applies to different pieces of evidence they may be looking at.

Puzzles for extra info (Not a priority): Around the boat there will be different puzzles. The player may be able to crack open several safes throughout the game, giving them new evidence to put to the evidence wall and maybe expanding their knowledge on who the killer is. The player may also be able to re-arrange paintings for further evidence/clues.

Visual Styles

The game will be predominantly black and white, with just the blood in red. This visual style will provide a distinct appearance akin to Sin City. However, depending on the play test, the graphic style may alter if the play testers dislike the black and white as it may hides any visual information.

Audio Considerations

Audio will be used in our game to enhance the players experience. The sounds we would like to include are:

⦁ Ocean sounds/rain

⦁ Crowd muttering 

⦁ Boat sounds, engine, creaking etc.

⦁ Footsteps

⦁ Character voices/mumbling

⦁ Jazz or appropriate music

All of these different sounds will be used to make the player more immerse in the environment and the game that that they are playing.

PRE-PRODUCTION/PROTOTYPE WORK

After deciding what I wanted to do for the main menu, I started working on a rudimentary prototype for the Unreal project. I began with creating the UI components because they are basic and can be simply produced utilising everything that Unreal offers. After the UI elements were constructed, they were placed on the screen, and a 3D environment was made behind the buttons to provide an intriguing aspect so that the player could see something fascinating on the main menu. Following that, I linked the menus to various cameras in the level blueprint. This was done so that they would move based on whatever menu you were viewing (this was done with the help of another member of the team).

During the prototype stage of development i was tasked with experimenting with designing characters. Previously i have used a program called Fuse to develop characters which is a simple to use character creator which allows me to make characters with clothing and accessories. The reason for making this character is this program is because i could easily get a handful of characters made for a basic prototype and if we have time towards the end of the project we can improve the character models.

PROJECT MANAGEMENT

Our team is attempting to keep open lines of contact. As a team, we believe that if we do not correctly convey our ideas, the end product will fall short of expectations. In this blog, I will go over the many methods that we communicated as a team to ensure that the final result was correct.

Group meetings: 

We had a number of meetings over the course of the project during the original idea development and prototyping stage. Some of these sessions were in person, when we would all sit around a computer brainstorming new ideas with the rest of the team. During these in-person sessions, we would be able to show other people our prototype project and solicit thoughts and suggestions from outside sources for improvements to the game’s performance.

We also talked as a team on Discord, where we would debate various ideas that team members would bring to the table. We would share screenshots of our work on Discord to ensure that every member of the team was engaging in the task assigned to them.


Google Docs: 

We created a Google Docs document to ensure that every member of the team understood the premise of the game we were developing. We prepared a Google Docs page that explained the essential premise and story of the game so that everyone on the team understood what we were working on. We implemented this so that team members would not deviate from the basic concept while writing blog entries or generating game assets.

Gantt Chart:

 Two members of the team opted to create gantt charts while developing this game so that everyone in the group could see what needed to be done. The figure below depicts the project gantt chart from all departments, with purple representing Max, green representing Kieran, blue representing myself, and orange representing Cameron and Jack. This chart lets the entire team to understand who should be where at what time, and it is vital not to fall behind or the project will not be done on time, making it incredibly efficient.

3D Modellers assert list: 

Members of the group discussed and decided on an asset list that would allow 3D modellers to choose and display progress on the items they were creating. The following asset chart depicts the assets and their priority. Individual 3D artists will choose which models to make and label them with their names. They will then change the colour of the box to represent the model’s stage of development.

Production Pipeline

The key to producing a successful product is to ensure that everything flows and that things are completed at the proper time. I designed a basic pipeline model to demonstrate what has to be done first before proceeding to the next stage of development. This, together with the gantt chart, helps us to readily identify how we should grow our game.


GitHub: 

We utilised github to help us cooperate as a team since it allowed us to all have access to the same project and contribute our respective components to it. Github was simple to set up, and we began development as soon as we all got access to it.

CHARACTER CREATION

Before beginning to create any characters, I reviewed the proposal documents that my team and I created to get a sense of what the characters will look like. I knew the game would be set in 1920s New Orleans, so I began producing sketches and mood boards to show the rest of the team the style and ideas I had for the characters, as well as whether they wanted me to make any modifications.

CC TINSLEY:

I began with the primary character, CC Tinsley. I began with this character because I would be using it for the main menu and other members of the team would require it to begin working on other sections of the game.I came up with some initial designs for different kinds of attire for the character after looking at various photographs of what a 1920s investigator would look like. After careful consideration, my team and I opted on the brown coat design since we felt it would better fit the character and make him stand out from the other characters wearing black suits.

PASSANGERS:


To build the characters, I utilised a programme called fuse and edited the models that they provided to produce the models that we had. Some of the clothing options provided by fusion are rather limited to the historical period and appearance that we wanted to achieve in our game, so I had to create custom apparel. I did, however, utilise the programme to modify the textures of some of the clothing items in order to give them a more vintage appearance.

CHARACTER PROFILES:

After making all of the characters that we needed, I created UI elements featuring the characters, and another member and I developed character backstories and bios for each character to flesh out the characters even further. We did this so that I and the other team members could get a sense of the characters and their personalities.

MAIN MENU

CONCEPT ART:

When creating the main menu, I came up with various ideas for what I might use for the main menu, such as having the figure surrounded by darkness with the buttons to the side of him. We also investigated many ideas for the main menu, such as the main character being on a boat.


PROTOTYPING:

I constructed a basic block out scene in Unreal for the main menu that I could modify with objects provided by the 3D modellers. Then, by adding default ui elements, I was able to create several menus into which I could incorporate various features for adding more options to the game and allowing the player to choose graphical settings to help it run on their own computer.

FINAL MENU:

CUT SCENES

PRE-RENDERED VS IN-GAME CUT SCENES:

I debated whether to make in-game cut scene or have them pre-rendered for this game. The advantage of having pre-rendered cut scenes is that it allows me to assist in the transition between different levels. Instead of a basic loading screen, I could mask the change with a pre-rendered cut scene, making it more immersive for the player and preventing them from feeling disconnected from the game they are playing.

In-game cut scenes will be tailored to the game’s resolution, allowing them to fit more into the game. Pre_rendered cut scenes can only be recorded at a specific resolution. For example, if you record a pre_rendered cut scene at 1920 x 1080, it will only be displayed at that resolution in game.

OPENING CUTSCENE:

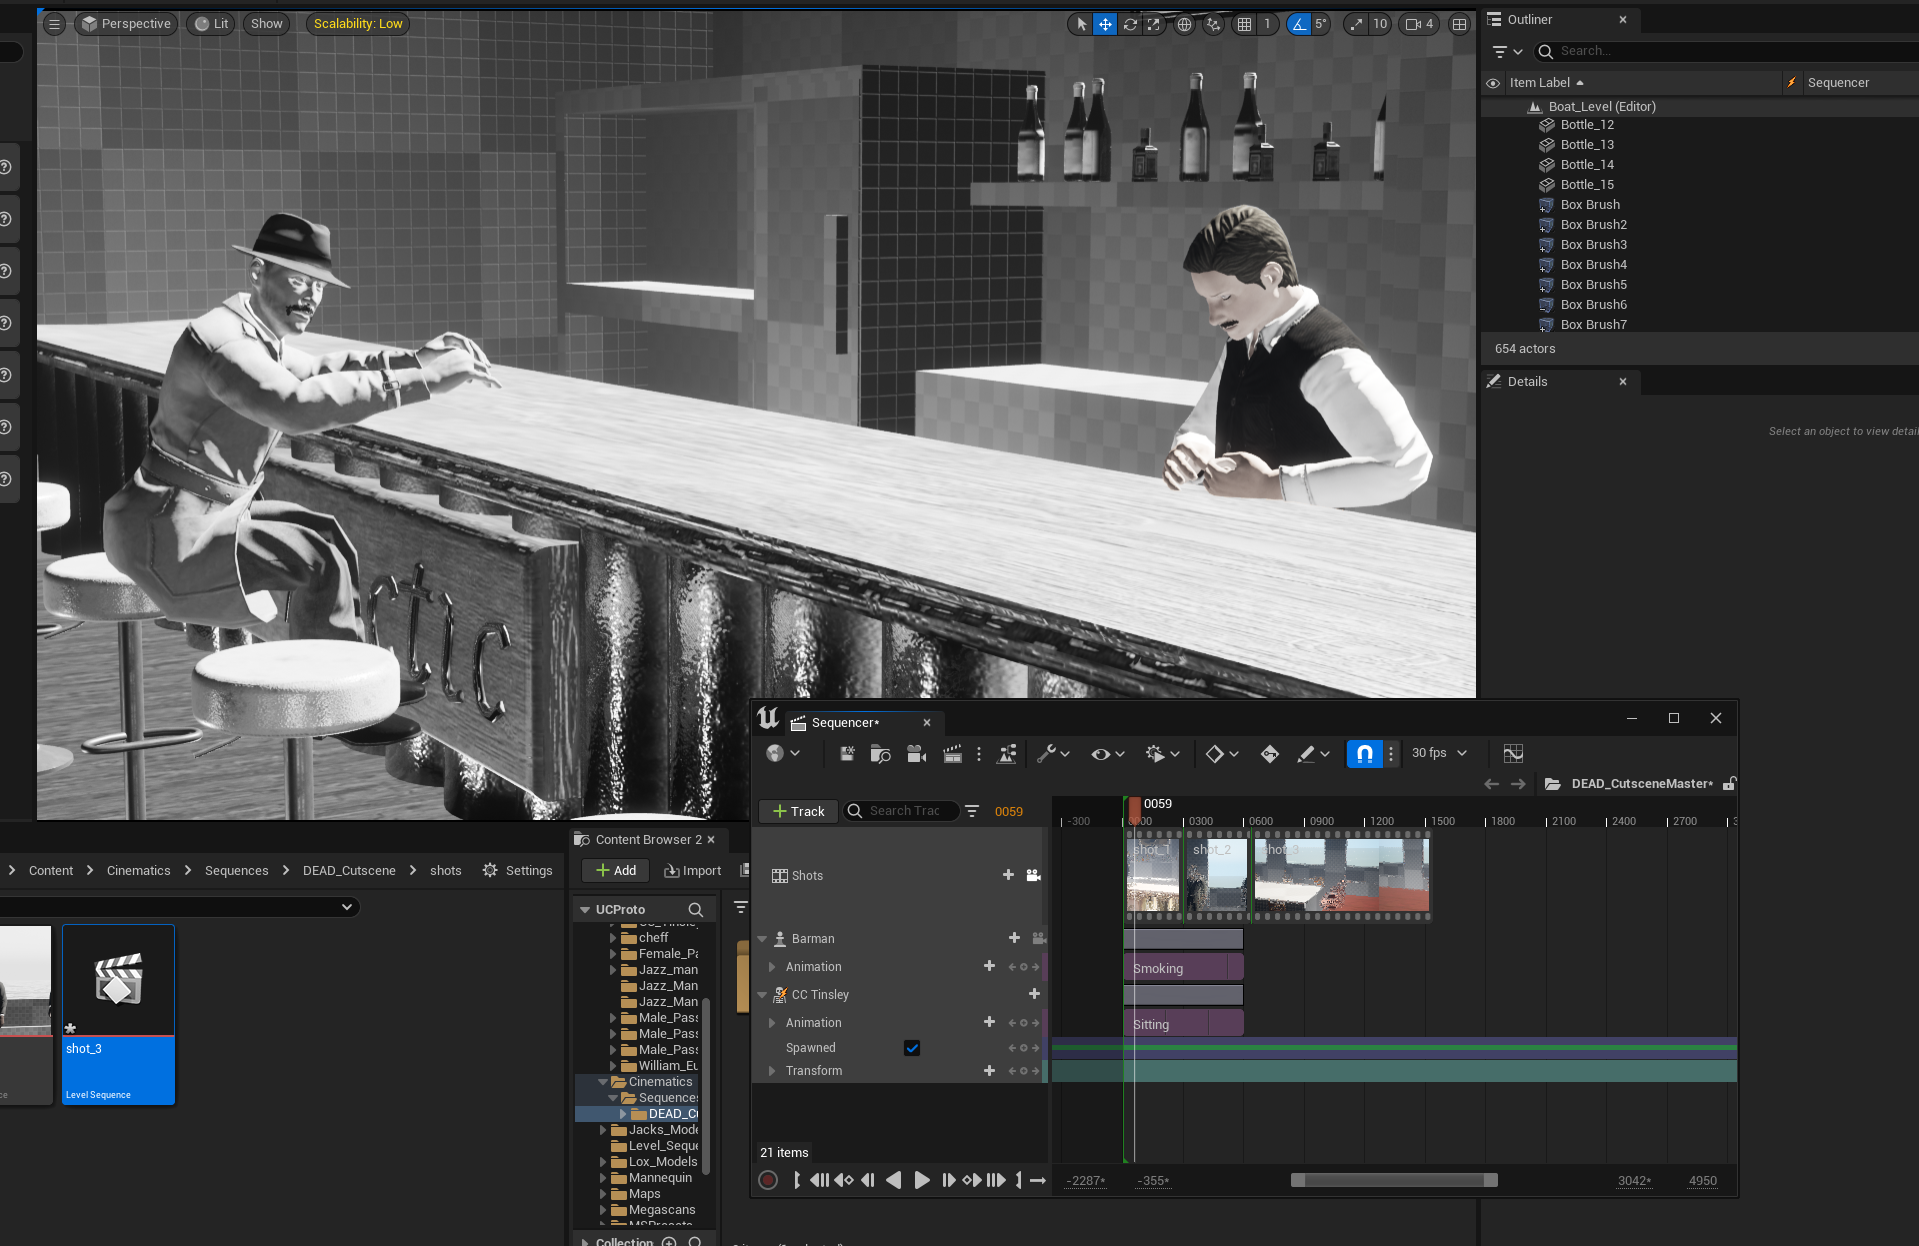
I was entrusted with creating the first cutscene, which shows the host of the party being poisoned. I needed to wait for the dining room to be completely blocked out before I could figure out where all of the characters would be for the main sequence. I knew what I had to establish in the cutscene after discussing the story with other team members and knowing what would happen before and after the cutscene. I decided to make this cutscene in game because all of the assets I need are already done, and anything that isn’t modelled can be substituted with block out assets, eliminating the need to re-render the cutscene.

We chose to add more to the opening cutscene after some thought to develop more of a narrative. We discussed adding a scenario in which the main character, CC Tinsley, speaks to the audience and establishes that the game you’re about to play is a flashback to a story that CC Tinsley is telling you.

I wanted to make linkages between the suspects and the character who is being poisened in this moment. Because this is one of the first things the player will see and they won’t know anything about the plot, I wanted to establish the setting for them. This will be accomplished quickly with narration and the characters speaking within the cutscene. More in-game dialogue between characters will create more links and backstory.

After some additional thought, I approached the team with the notion of having the opening cutscene pre-rendered. I wanted to accomplish this because it would be better for playing the game if there was no loading screen between the main menu and the cutscene so that the engine could generate the environment. The cutscene would be the loading screen that connects the menu and gameplay. This allows for more interaction with the player because there is always something happening on that they may focus on. I wanted to render this cutscene at least in 2k resolution so that it would appear well on most monitors. I’ll add dialogue and music to the video once it’s rendered to add additional detail.

FINAL CUTSCENE:

I added voice acting, sound effects, and jazz music to the opening cinematic to give it more atmosphere.

GUN SHOT CUTSCENE:

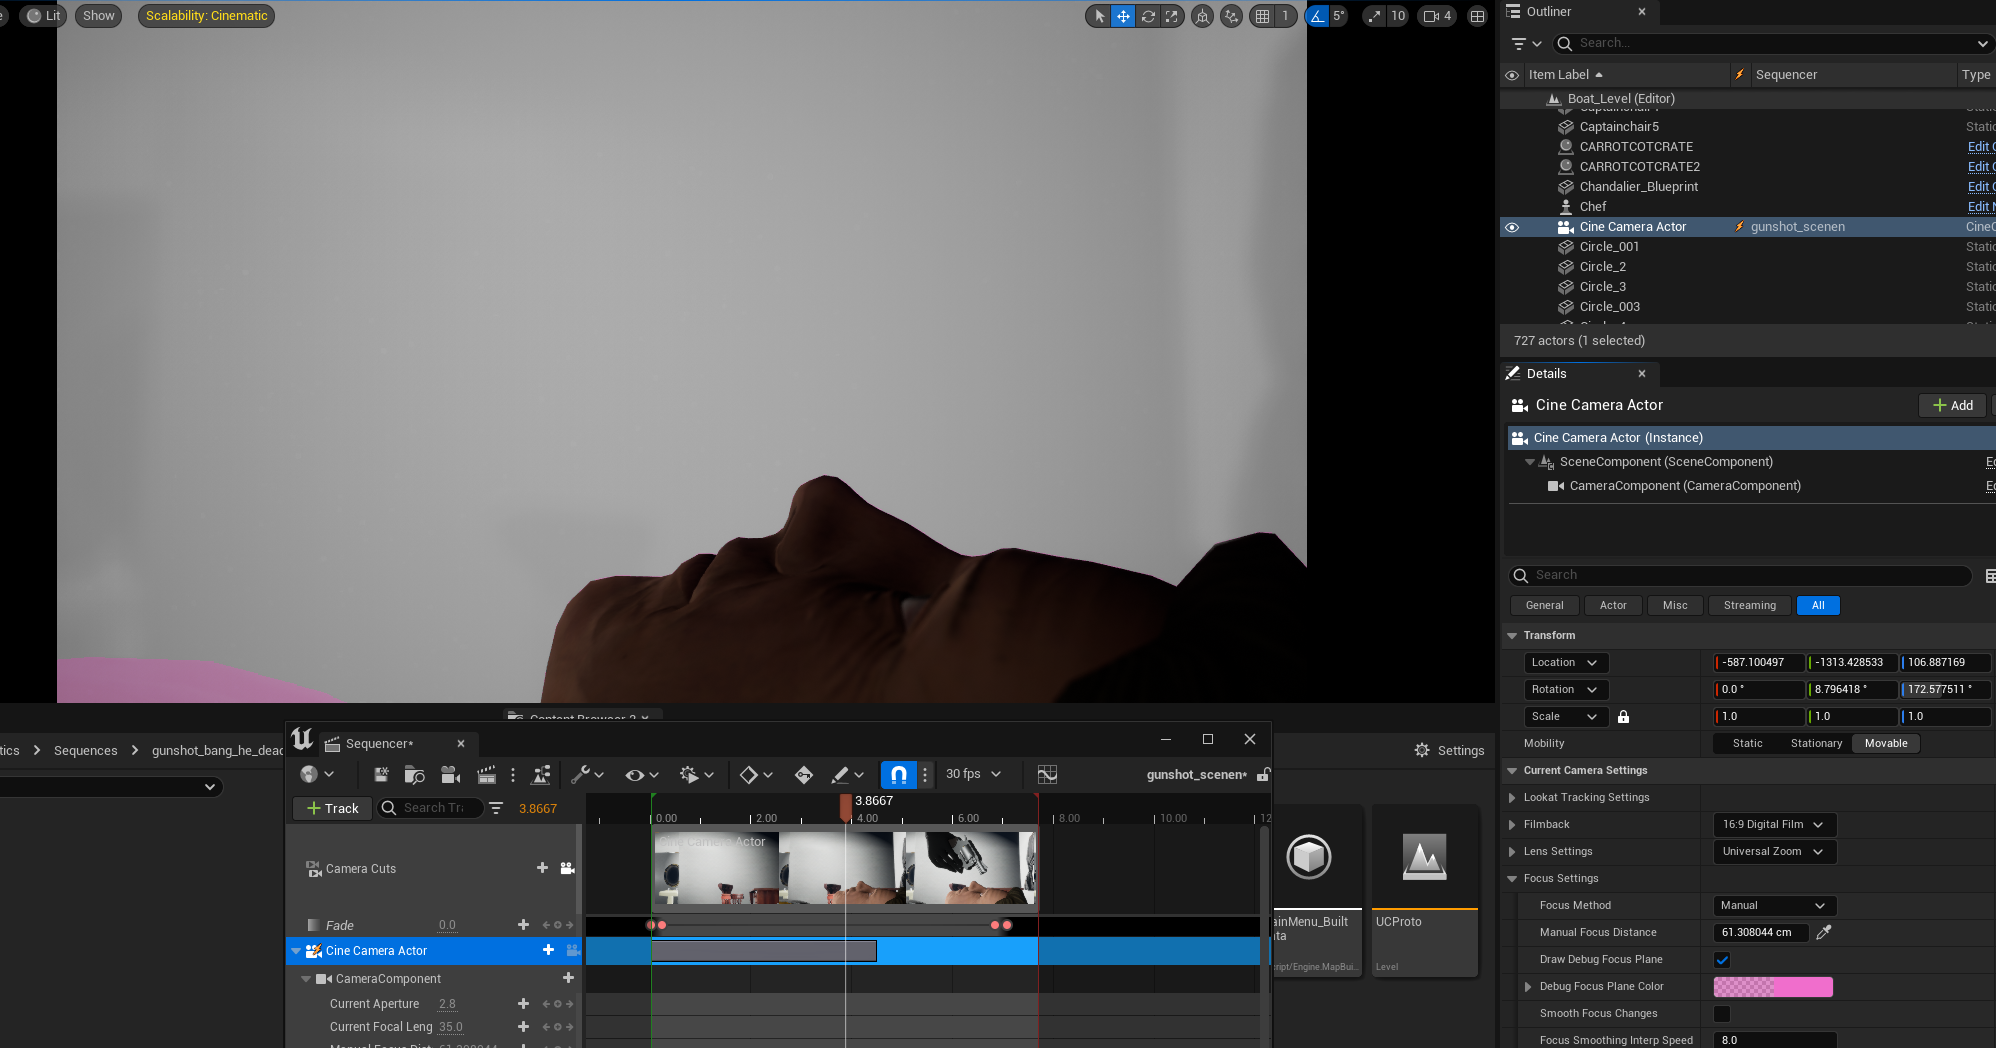
I had to depict the character William Eubanks’ demise in the second cutscene. I wanted to make homage to vintage detective serials when the murderer’s silhouette is seen for this. Assailant would be pointing pistol at defenceless William. I utilised the CC Tinsley hand that another team member had animated in a grab animation as the murderer’s hand and gave it a black texture to maintain the sense of ambiguity regarding the identity of the murderer and prevent you from determining it from the murderer’s hand alone. For a more realistic appearance and to better conceal the hand, I also gave the camera depth of field. This scene is a is used to transition between the first and second locations.

UI DESIGN

Making 2D components for the UI was another responsibility I had for this project. This meant that I would create UI design concepts and present them to the team members for feedback. I would then replace the default elements that they had used after another team member had developed the functionality. I would create user interface elements for sections like the main menu, dialogue boxes, and a HUD if necessary. I had to discuss with the rest of the team what UI components the game required before I could start creating any UI.

EVIDENCE BOARED:

We intended to incorporate an evidence board so that the player could connect pieces of evidence and increase gameplay immersion. I sketched out a plan for the evidence board, and another team member suggested that they implement a system that allows you to draw lines between the items on the board.

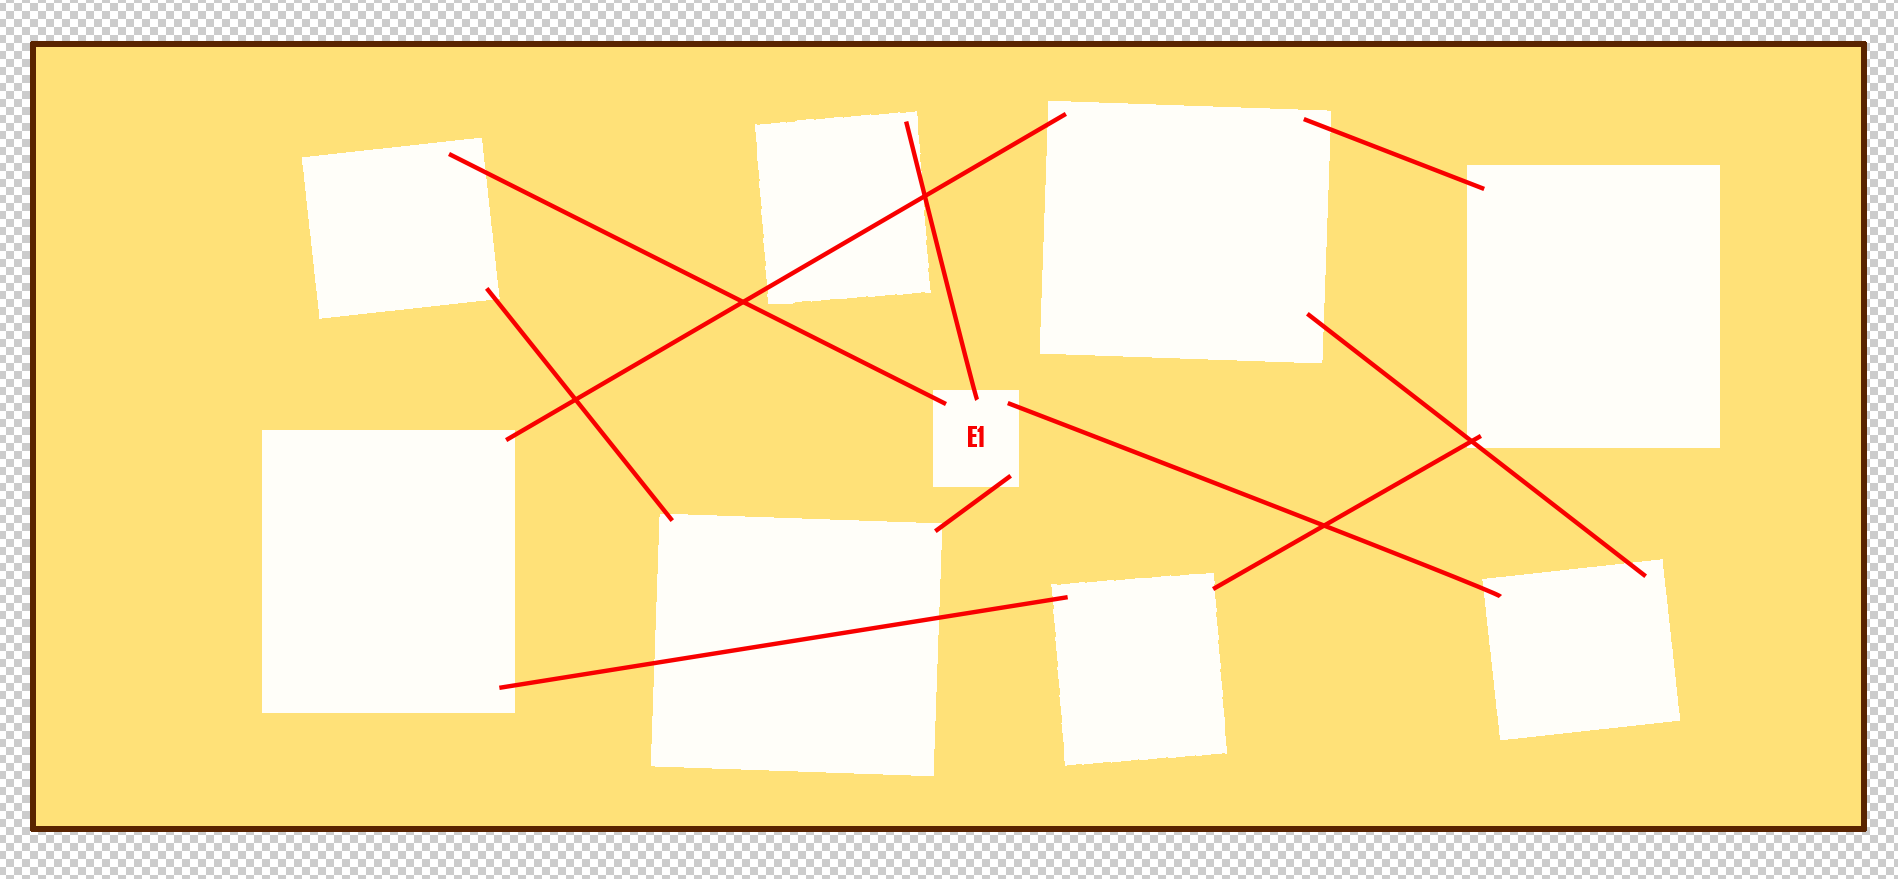
We ultimately decided against including the evidence board ideas since it was tedious for players to traverse back and forth from the room to other parts of the game. Since the player may always carry a journal or note book with them, we decided to switch the gameplay from being evidence-based to that instead.

JOURNEL/NOTEBOOK:

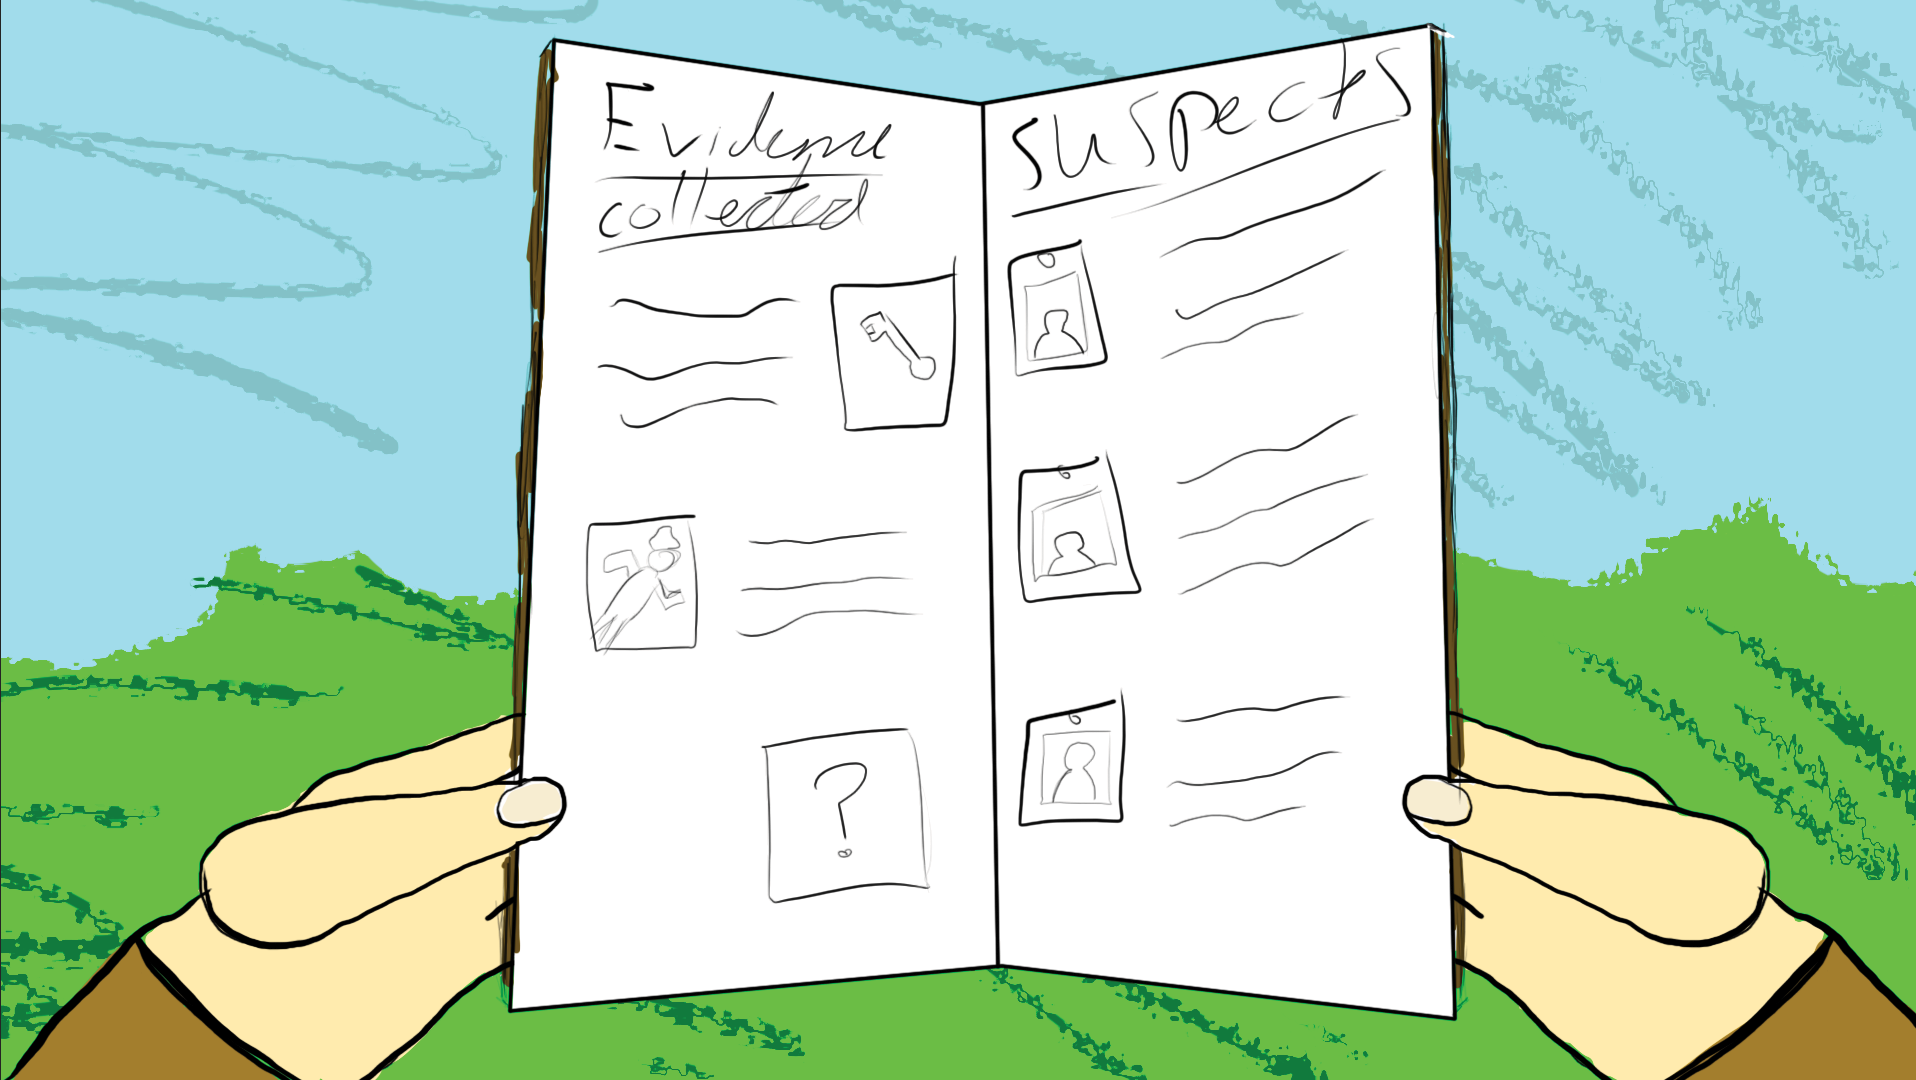
I sketched out a basic design for a notebook system that would play an animation of the main character taking out a book and flipping through the pages. This would increase player interaction and be an excellent idea to test and incorporate into the game.

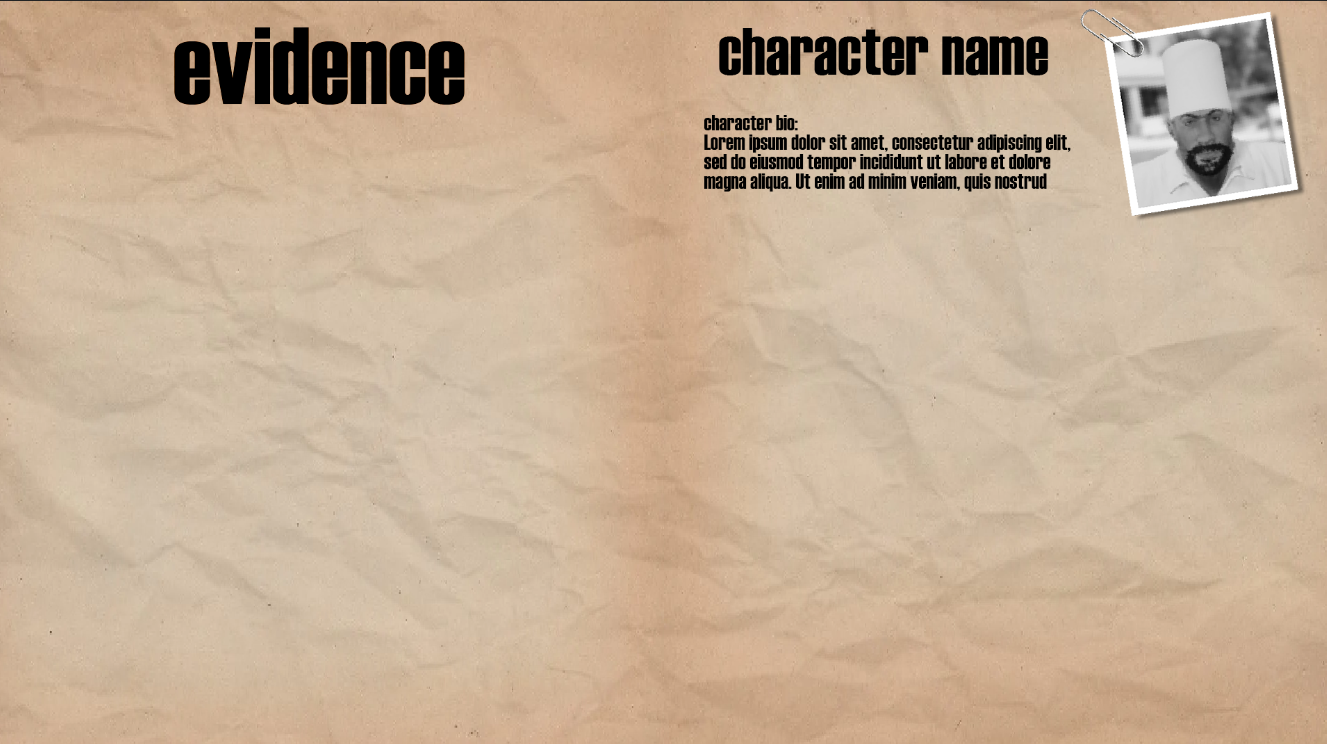
Later, we made the decision to use an ui element rather than a system where you pull out a book. I examined the idea and the games that served as the project’s inspiration for this. The character biographies in-game in Batman: Arkham Asylum resemble paperwork. This was one of the games I selected. I made the decision to use this as a guide when developing our ui.

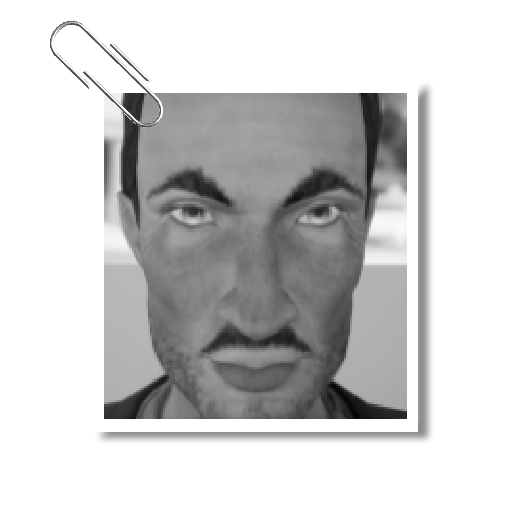
I created various pictures of the characters that resembled photographs of the ones that were uploaded on the page. I then created a mock-up button that another team member would later incorporate into the game.
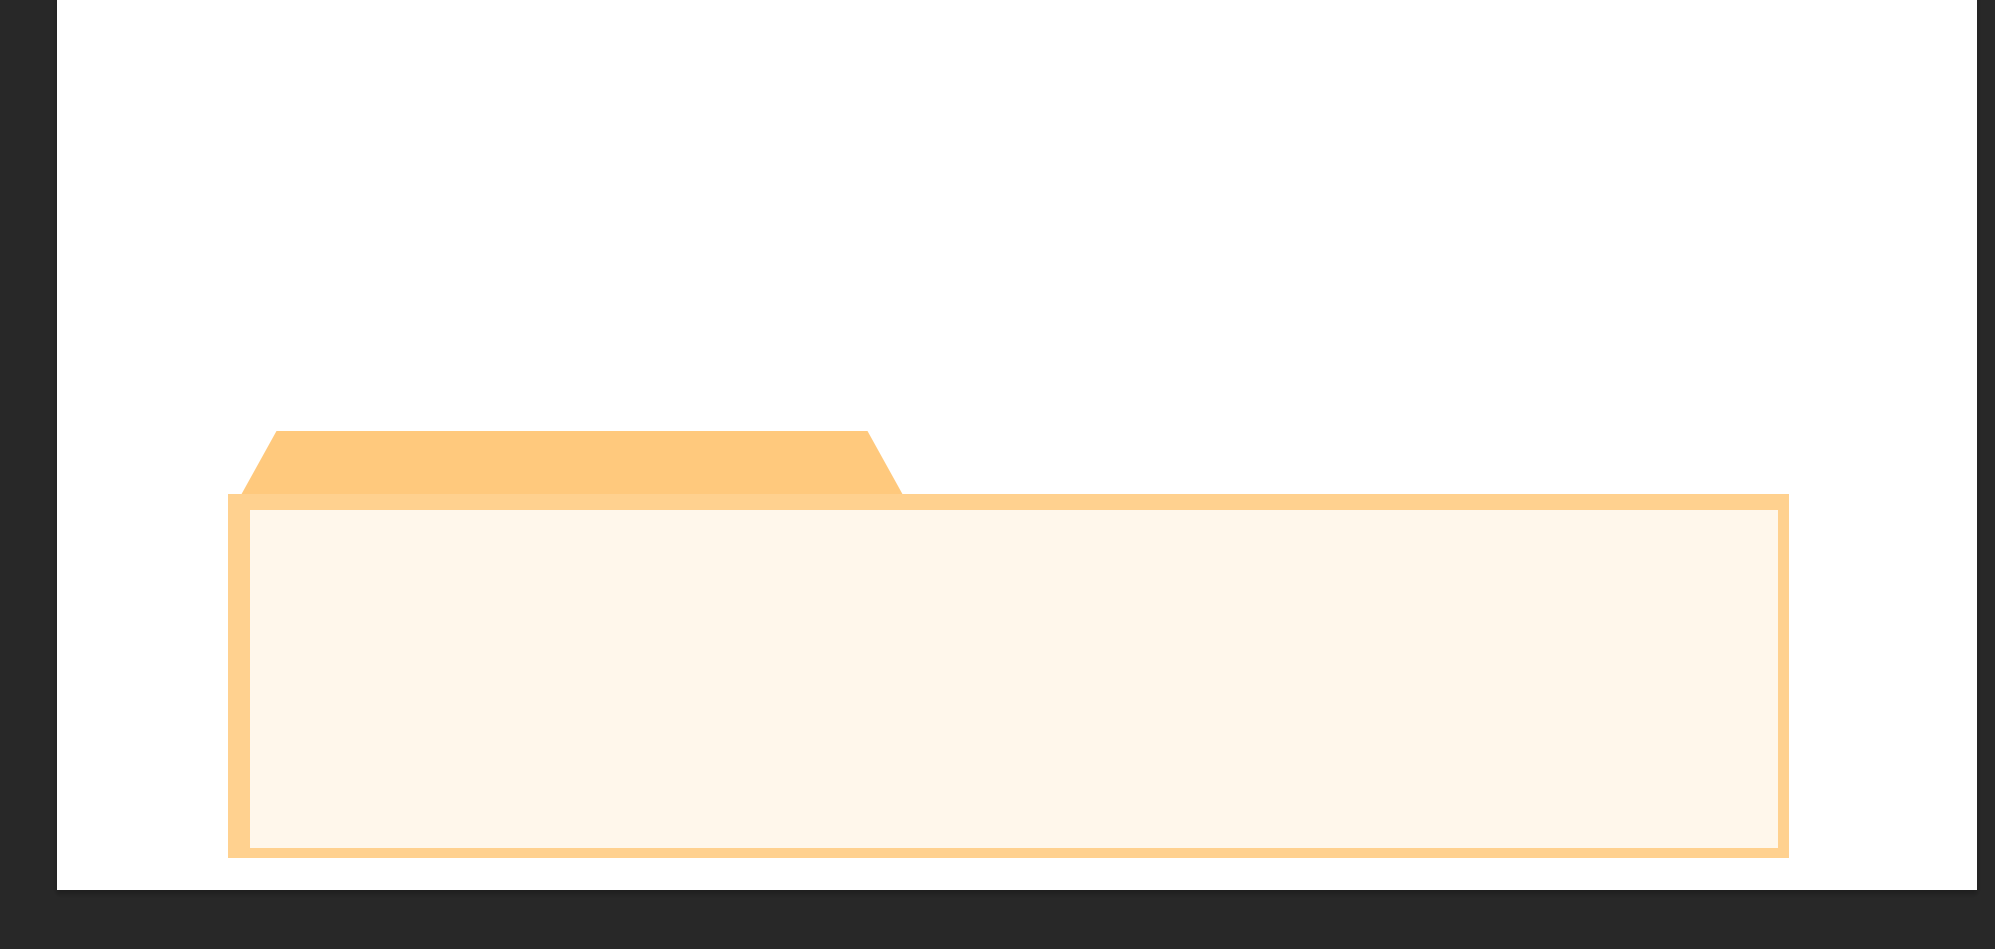
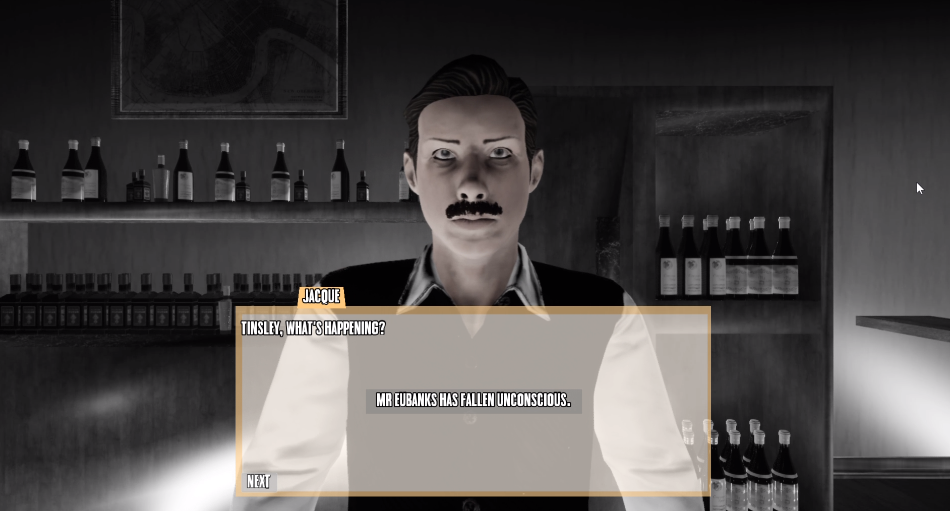
DIALOG BOXES:

I initially added the button ui texture to the ui for the dialogue boxes, but I thought it might be enhanced. I created a dialogue box that appeared to be a file that a detective would use after studying photographs of various user interface boxes for the upgraded user interface. For this, there would be room for the suspects name at the top and space in the middle for text options. I added fonts into the game. Initially, a handwritten font was to be included, but because it was difficult to read, i modified the font to one that was more blocky. I did this to make it easier for players to read because several testers for our game had trouble doing so.

OVERVIEW

TEAM MANAGMENT: 

We chose Max to be the team leader and organiser right from the start of the project. because he is the sharpest and best at organising. In order for the team to know what needed to be done and how much time they had to complete it, we set up a gantt chart and a trello board.

We communicated using apps like Discord and had in-person meetings to go over all we needed to do and check our schedules. We also take a look at each person’s primary skills. When asked if they were comfortable with the tasks they were performing, everyone said they were.

After a few weeks of development, we would hold a brief meeting to check on everyone’s progress. If somebody wasn’t keeping up, we would ask them if they needed assistance or if anything else could be done to make things easier on them and free up work for others.

We learned a lot more about team collaboration and how to properly organise it throughout the course of the project. When the development process first began, we had trouble getting everyone to work on the project at once. One method we resolved this problem was by scheduling different times for people to work on the project. For instance, the 3D modellers would work on the project and upload their models so that the level designers could go on and edit and adjust what they had posted later. Another fix that we did was giving everyone their own levels so that the 3D modelers could upolaod there works to their own levels and the coder can do all the machanics in his own level.

WHAT WENT WELL: 

Overall, there was good team communication and attendance from the members who needed to be there. Even though the original concept for the product was altered, we still managed to create a complete, solid, and enjoyable final product that met the requirements.

The story is simple to follow, and by using cutscenes, we were able to tie its disparate parts together and present a compelling narrative.

WHAT COULD HAVE BEEN IMPROVED: 

Despite having good group communication. We had trouble getting people on the project and keeping track of who was working on it when at the beginning because we didn’t fully understand the communication component until we were developing our product.

I also believe that the plot should have been developed much earlier in the development process so that we could tell the 3D modellers what clues we required knowing what the tale was rather than having them create some models and then determine the story later.

Scroll to Top